
Tuesday, April 26, 2011
School Art Gallery
The school's annual Art Gallery is this week and there will be displays all throughout the school. This is one of the displays that was created for my student's artwork:
I will be displaying more of the art exhibits as the week goes on :)
Wednesday, April 20, 2011
Jackson Pollock
Today we had a trip scheduled and a few students and I had to stay back from the trip, so I wanted them to have a fun day since they didn't get to go on the trip. I had seen a fun art lesson on storyboardtoys.com on art inspired by Jackson Pollock. I had bought a bag of marbles at the dollar store and had a few aluminum trays and thick white paper. Each student picked three to four colors and put them into a color pallete and then put a marble in each color and then placed the marble on the paper and moved the marbles around until they had the paper covered in a design of their choice. Check out their artistic pieces:


Tuesday, April 19, 2011
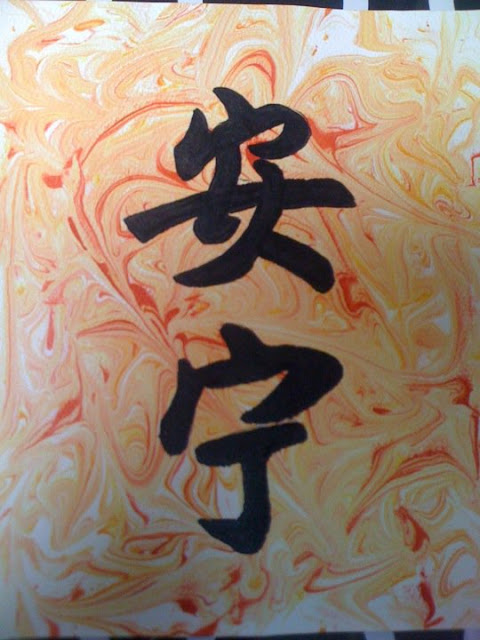
Marbled Paper
I was amazed when I found out how shaving cream and paint could be used to create a marbleized effect on paper. I found step by step instructions on wikihow.com. The students started the project by choosing 2-3 colors they then put about an inch think of shaving onto a cookie sheet and put a few drops of each color on top of the shaving cream. They then swirled the colors around using the back of a paint brush, but they made sure not to over swirl since the colors may get muddy. The results were beautiful and the students then used stencils to create silhouette designs on top of the marbleized paper. Another student was very creative and used her paper to create the ice cream on her painting.


Koi Fish
A lot of my students are into drawing anime and Japanese inspired art so I thought it would be great to draw Koi fish. I found a great step by step drawing lesson on Dragoart.com. The students followed the steps and their end creation looked like this

The students the used colored pencils to color in their art and added chinese characters and lotus flowers to their work.


And here are their complete works :
Picture Stretching
This is an awesome lesson plan that uses used calendar pictures. I found this lesson plan on the blog that artist woman. The students started the lesson by choosing a picture of their choice. Students liked the fact that they could choose any picture they like. They then were told to make 1 inch strips using a ruler and pencil and to number the strips and cut them out. They then pasted the first strip down and then did not paste the second and then pasted the third, alternating and pasting the odd number strips leaving blank spaces where the even number strips would be. After they are done pasting they then put the strips next to the first strip and tried their best to replicate the images on the missing strips, it was almost like drawing in the missing puzzle pieces to complete their pictures. After they were done drawing with pencil they then went back and colored their pictures with watercolor pencils using the corresponding colors on their strips. Many students who often do not have confidence in their artistic abilities were astounded with their results and felt good about their completed work which was great to see!!! Here are some of the completed projects:


Gustav Klimt- Baby
The next lesson I was able to get from a wonderful book called Dynamic Art Projects for Children.
The book is wonderful because it gives step by step instructions on how the project should be from start to finish. My students were first introduced to the artist Gustav Klimt and his painting Baby
 they then started their projects by drawing a face or character at the top of the page and drawing lines going down making a blanket. Within the lines they chose patterns such as stars, circles, dots, squares... etc. They then outlined their drawing with a sharpie marker and then used watercolor to color their painting. The students really enjoyed this lesson :)

The book is wonderful because it gives step by step instructions on how the project should be from start to finish. My students were first introduced to the artist Gustav Klimt and his painting Baby

Starry Night
Even though I am a novice art teacher ... I like many other people am familiar with the great masterpiece Starry Night by Van Gogh. I found a great art lesson on Princetonol.com my students used the original Starry Night painting as a template and used crayons and watercolors to create their own interpretation of Starry Night and the result was beautiful.


Teaching Perspective
I remember making perspective drawings in elementary school and how the ease and importance of learning the key concepts of one-point persepective. I decided this would be a great second lesson and I would a great tutorial that the students were able to follow step by step Olejarz.com. The students found the website to be very user friendly and easy to follow to understand concepts such as the vanishing point. Here's a sample of my student's work :


My first art lesson
Hello bloggers! I am currently a new teacher and teach special education students ages 13-20 years old. I have started a new job and they had asked me to be THE ART teacher... I put emphasis on this because this has to be one of the most meaningful subjects students can take. I have no background education in art so I was very apprehensive in how I would be able to tackle this and take on the role as THE ART teacher lol.
Well it's been 6 months and so far I have been fortunate enough to have discovered the wonderful blogs of so many great and dedicated art teachers in the world of blogs! There is a wealth of information out there on the internet and it has been great learning and teaching my students. The first art lesson which I felt comfortable and at ease to introduce to my students was Kandinsky's Circles

which I found on the site Lines, Dots, and Doodles. My students used watercolors and pastels and they felt very comfortable and confident with their results. Here is a sample work of one of my students

Well it's been 6 months and so far I have been fortunate enough to have discovered the wonderful blogs of so many great and dedicated art teachers in the world of blogs! There is a wealth of information out there on the internet and it has been great learning and teaching my students. The first art lesson which I felt comfortable and at ease to introduce to my students was Kandinsky's Circles
which I found on the site Lines, Dots, and Doodles. My students used watercolors and pastels and they felt very comfortable and confident with their results. Here is a sample work of one of my students

Subscribe to:
Posts (Atom)